

Abstract
Mono-spaced Bold
To see the contents of the filemy_next_bestselling_novelin your current working directory, enter thecat my_next_bestselling_novelcommand at the shell prompt and press Enter to execute the command.
Press Enter to execute the command.Press Ctrl+Alt+F2 to switch to a virtual terminal.
mono-spaced bold. For example:
File-related classes includefilesystemfor file systems,filefor files, anddirfor directories. Each class has its own associated set of permissions.
Choose → → from the main menu bar to launch Mouse Preferences. In the Buttons tab, select the Left-handed mouse check box and click to switch the primary mouse button from the left to the right (making the mouse suitable for use in the left hand).To insert a special character into a gedit file, choose → → from the main menu bar. Next, choose → from the Character Map menu bar, type the name of the character in the Search field and click . The character you sought will be highlighted in the Character Table. Double-click this highlighted character to place it in the Text to copy field and then click the button. Now switch back to your document and choose → from the gedit menu bar.
Mono-spaced Bold Italic or Proportional Bold Italic
To connect to a remote machine using ssh, typessh username@domain.nameat a shell prompt. If the remote machine isexample.comand your username on that machine is john, typessh john@example.com.Themount -o remount file-systemcommand remounts the named file system. For example, to remount the/homefile system, the command ismount -o remount /home.To see the version of a currently installed package, use therpm -q packagecommand. It will return a result as follows:package-version-release.
Publican is a DocBook publishing system.
mono-spaced roman and presented thus:
books        Desktop   documentation  drafts  mss    photos   stuff  svn
books_tests  Desktop1  downloads      images  notes  scripts  svgs
mono-spaced bold and the output of a command in mono-spaced roman. Examples:
0 root@cl-head ~ #echo "I'm executed by root on a head-node"I'm executed by root on a head-node
0 root@beo-01 ~ #echo "I'm executed by root on a compute node"I'm executed by root on a compute node
0 root@sn-1 ~ #echo "I'm executed by root on a storage node"I'm executed by root on a storage node
0 user@workstation ~ $echo "I'm executed by user admin on the admins workstation"I'm executed by user admin on the admins workstation
mono-spaced roman but add syntax highlighting as follows:
package org.jboss.book.jca.ex1;
import javax.naming.InitialContext;
public class ExClient
{
public static void main(String args[])
throws Exception
{
InitialContext iniCtx = new InitialContext();
Object ref = iniCtx.lookup("EchoBean");
EchoHome home = (EchoHome) ref;
Echo echo = home.create();
System.out.println("Created Echo");
System.out.println("Echo.echo('Hello') = " + echo.echo("Hello"));
}
}
Note
Important
Warning
qlustar-docs@qlustar.com to report errors or missing pieces in this documentation.
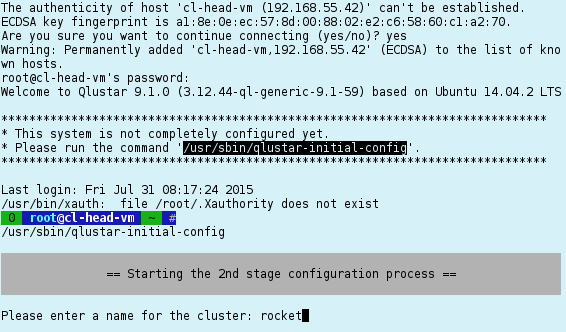
/usr/sbin/qlustar-initial-config
keep the local version currently installed.
Remaining configuration steps run-through
Cluster name
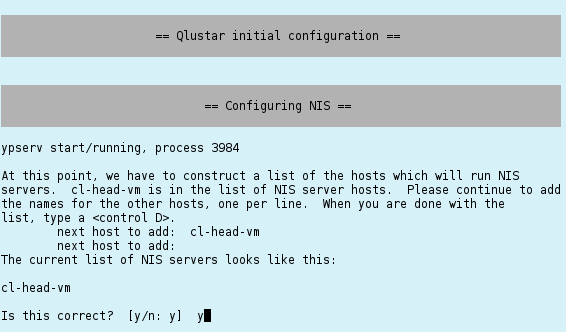
NIS Setup
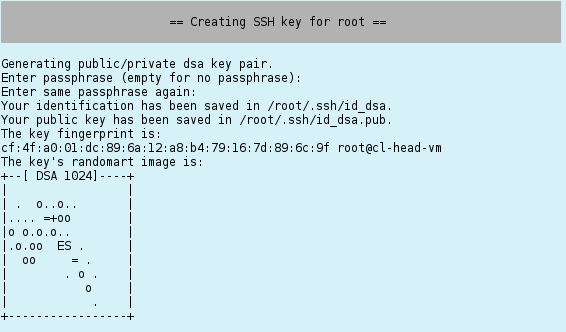
Configuring ssh
Note
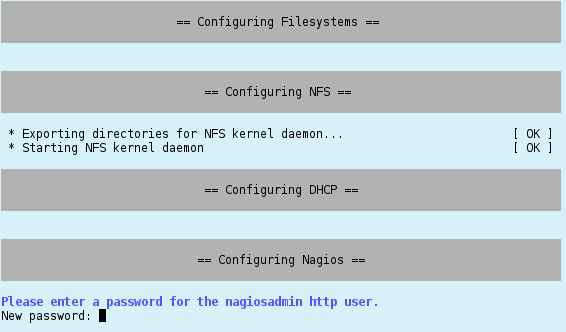
Configuring Nagios
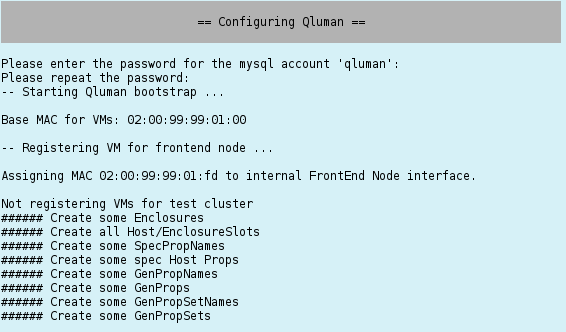
Configuring QluMan
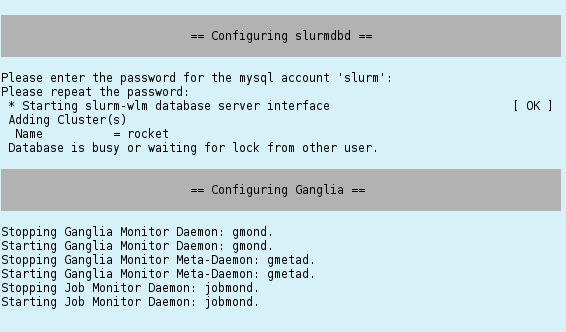
Configuring Slurm
Note
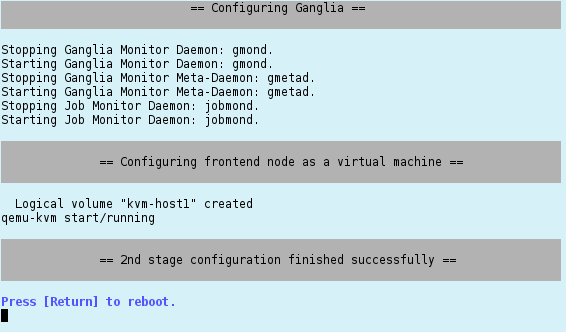
Configuring the virtual Demo Cluster
Setting the MariaDB root password
/etc/aliases and/or /etc/postfix/main.cf. In case some of them are wrong, you can execute
to modify them.0 root@cl-head ~ #dpkg-reconfigure postfix
and to stop it0 root@cl-head ~ #demo-system-start
These commands use the configuration file0 root@cl-head ~ #demo-system-stop
/etc/qlustar/vm-configs/demo-system.conf. If you find that the (automatically calculated) amount of RAM per VM is not right, you can change the variable CN_MEM to some other value in that file. The consoles of the virtual nodes (and also of the virtual front-end node if you chose to set one up) are accessible in a screen session. Type
to attach to the console session of the virtual FE node and0 root@cl-head ~ #console-fe-vm
to attach to the console sessions of the virtual demo cluster nodes. Note that the screen command character is Ctrl-t. To detach from the screen session, type Ctrl-t+d, to switch to the next/previous screen type Ctrl-t+n / Ctrl-t+p. More details on the usage of screen (or byobu, the Debian customized version we use) are available in the corresponding0 root@cl-head ~ #console-demo-vms
man pages. To check whether all nodes are up and running, type
0 root@cl-head ~ #dsh -a uptime
dsh or pdsh can be used to execute arbitrary commands on groups of nodes. Check their man pages and the corresponding section in the QluMan guide for further information.
nagiosadmin with the password you specified previously.
/etc/exports
Note
/srv/apps/chroots/chroot name, where chroot name would be trusty. Each of them contains a full-featured installation of the corresponding Qlustar edge platform. To change into a chroot, convenience bash shell aliases of the form chroot-chroot name are defined for the root user on the head-node. You may use them as follows (e.g. for Ubuntu/Trusty, if it was selected at install):
Once you're inside a chroot, you can use the standard Debian/Ubuntu tools to control its software packages, e.g.0 root@cl-head ~ #chroot-trusty
The nice thing about this mechanism is that software from packages installed in a particular chroot will be available instantaneously on all compute/storage nodes that are configured to use that chroot.(trusty) 0 root@cl-head ~ #apt-get update(trusty) 0 root@cl-head ~ #apt-get dist-upgrade(trusty) 0 root@cl-head ~ #apt-get install package(trusty) 0 root@cl-head ~ #exit
Important
The token can also be saved directly to a file using the(trusty) 0 root@cl-head ~ #qluman-cli --gencertGenerating one-time login token for user 'admin': Cluster = QL Hostname = beosrv-c Port = 6001 Pubkey = b'T)5o]@hsjB2qyY>eb:7)8@BA?idMf>kh%^cRhV/#' Enter new pin for one-time token: Server infos and one-time login token for user 'admin': ---[ CUT FROM HERE ]--- 00000191c2MAAcMuyCNQR0DPILx-y-BLCHpITepvG7R3I6452Cdqiu98u4PsM1VWFGqEAG V8YN9K5kyJKHtQHGTB1JqZIwt4q0PLArnyNmhCkGLS6VxWWBDtBB9_dGPqLH4OeQ7sZ725 6XDGgrKo4Dldc_wuCALegczjYV8oc_yZ07X0oIYlzhDlDpk-hTm5bfW8_x904YF0wcv-G- nK1ztRg854O7pC_p1YpEJuzWFqWv0e7ffi-ZgkxwfdGGKF3imp4d9yGY4h6Ixdn8TLG2gk Z4XQ4dymvSO9hp8mUabfq7prVUOTYeChB2pOrom8XSQxjOoe4Yll5yv6da_CdGq50KrO8Q C12Z4Pz2eSbvqXbo7c7DdLRjMc0v0Km3WyljgdsDYbKC5iT75Bgryc ---[ TO HERE ]---
-o <filename> option. The user the token is for can be specified by the -u <username> option like this:
The server infos and one-time login token are protected by the pin you just entered. This is important when the data is sent via unencrypted channels (e.g. email or chat programs) to users or when it is stored on a shared filesystem like NFS. The pin does not need to be a strong password. It is only used to make it non-trivial to use an intercepted token.(trusty) 0 root@cl-head ~ #qluman-cli --gencert -u admin -o tokenGenerating one-time login token for user 'admin': Cluster = QL Hostname = beosrv-c Port = 6001 Pubkey = b'T)5o]@hsjB2qyY>eb:7)8@BA?idMf>kh%^cRhV/#' Enter new pin for one-time token: Server infos and one-time login token for user 'admin' saved as 'token'
Note
Then you can launch qluman-qt remotely on the head-node, per ssh (with X11 forwarding enabled /0 root@cl-head ~ #apt-get install qluman-qt
-X option) as follows:
This should bring up the Management Console. Using the one-time token generated as explained above, you will now be able to add the cluster to the list of available connections. (Details about this are explained in the QluMan Guide).0 user@workstation ~ $ssh -X root@servername qluman-qt
apt sources list. This can be accomplished by executing the following as root on your workstation.
The second one should have imported the Qlustar PGP archive key, and must output a line like:0 root@workstation ~ #dpkg -l software-properties-common > /dev/null 2>&1 || apt-get install software-properties-common0 root@workstation ~ #gpg --no-default-keyring --primary-keyring /etc/apt/trusted.gpg --recv-keys E6BA110F3C0BC307
gpg: key 3C0BC307: public key "Q-Leap Networks (automatic archive key) <info@q-leap.com>" imported
Note
Ubuntu/Trusty execute:
Else for0 root@workstation ~ #add-apt-repository 'deb http://repo.qlustar.com/repo/qluman 9.2-trusty main non-free'0 root@workstation ~ #add-apt-repository 'deb http://repo.qlustar.com/repo/qluman 9.2-trusty-proposed-updates main non-free'
Ubuntu/Xenial:
After this you can install qluman-qt the usual way:0 root@workstation ~ #add-apt-repository 'deb http://repo.qlustar.com/repo/qluman 10.0-xenial main non-free'0 root@workstation ~ #add-apt-repository 'deb http://repo.qlustar.com/repo/qluman 10.0-xenial-proposed-updates main non-free'
0 root@workstation ~ #apt-get update0 root@workstation ~ #apt-get install qluman-qt
Note
universe repository enabled in your apt sources list for the above command to succeed.
0 user@workstation ~ $qluman-qt &
0 user@workstation ~ $singularity exec <path to singularity qluman image> qluman-qt
Note
0 user@workstation ~ $chmod 755 run-qluman-docker0 user@workstation ~ $./run-qluman-docker
Note
Note
./run-qluman-docker
			latest
Note
Important
Important
The behavior of the adduser.sh script can be customized in its configuration file0 root@cl-head ~ #adduser.sh -u test -n "Test User"
/etc/qlustar/common/adduser.cf. It also contains the definition of the initial default user password.
After this you should have created two executables. Check it with0 testuser@cl-front ~ $mpicc.openmpi-gcc -o hello-world-c hello-world.c0 testuser@cl-front ~ $mpif90.openmpi-gcc -o hello-world-f hello-world.f90
Now we're prepared to test the queuing system with the two programs.0 testuser@cl-front ~ $ls -l hello-world-?
This will run the job interactively on 2 nodes with 2 processes each (total of 4 processes). You should obtain an output like this:0 testuser@cl-front ~ $OMPI_MCA_btl="tcp,self" salloc -N 2 --ntasks-per-node=2 --mem=20 -p demo \ srun hello-world-c
salloc: Granted job allocation 3
NVIDIA: no NVIDIA devices found
NVIDIA: no NVIDIA devices found
NVIDIA: no NVIDIA devices found
NVIDIA: no NVIDIA devices found
Hello world from process 1 of 4
Hello world from process 2 of 4
Hello world from process 3 of 4
Hello world from process 0 of 4
salloc: Relinquishing job allocation 3
Note
NVIDIA: are new in Qlustar 9.2 and appear due to the fact, that we have enabled Nvidia CUDA support for OpenMPI. These lines are printed on nodes without supported Nvidia GPUs. They really shouldn't and unfortunately they can't be muted, since one of the Nvidia supplied binary-only libraries is responsible for them, so only Nvidia can provide relief. Anyway, it is just a warning that can be ignored.
hello-world-f90-slurm.sh (to see the output, execute cat slurm-<job#>.out after the job has finished):
Note that the environment variable0 testuser@cl-front ~ $sbatch -N 2 --ntasks-per-node=2 --mem=20 -p demo hello-world-f90-slurm.sh
OMPI_MCA_btl="tcp,self" is used in the above two examples to prevent error messages from not finding an Infiniband network. The latter would otherwise occur, because we compile OpenMPI to use an IB network per default and if not found, a TCP network is used as backup. TCP can also be set as the default in the OpenMPI config file (in the chroot, typically under /srv/apps/chroots/trusty/etc/openmpi/x.y.z/openmpi-mca-params.conf) by adding the entry:
btl = tcp,self
$HOME/.bash/alias. Example submission (assuming you have 4 running demo nodes):
Check that the job is started (output should be similar):0 testuser@cl-front ~ $linp-4-demo-nodes
Now ssh to one of the nodes in the0 testuser@cl-front ~ $squeueJOBID PARTITION NAME USER ST TIME NODES NODELIST(REASON) 27 demo linstres test R 2:46 4 beo-[201-204]
NODELIST and check with top that Linpack is running at full steam, like:
You can check the output of each Linpack run in the files:0 testuser@cl-front ~ $topPID USER PR NI VIRT RES SHR S %CPU %MEM TIME+ COMMAND 18307 test 20 0 354m 280m 2764 R 100 28.0 6:42.92 xhpl-openblas 18306 test 20 0 354m 294m 2764 R 99 29.3 6:45.09 xhpl-openblas
$HOME/bench/hpl/run/job-<jobid>-*/openblas/job-<jobid>-*-<run#>.out where <jobid> is the slurm JOBID (see the squeue command above) and <run#> is an integer starting from 1. The way the script is designed, it will run indefinitely, restarting Linpack in an infinite loop. So to stop it, you need to cancel the job like
0 testuser@cl-front ~ $scancel <jobid>
| Revision History | |||
|---|---|---|---|
| Revision 9.2-0 | Thu Apr 27 2017 | ||
| |||
| Revision 9.1-0 | Thu Jul 31 2015 | ||
| |||