

Abstract
Mono-spaced Bold
To see the contents of the filemy_next_bestselling_novelin your current working directory, enter thecat my_next_bestselling_novelcommand at the shell prompt and press Enter to execute the command.
Press Enter to execute the command.Press Ctrl+Alt+F2 to switch to a virtual terminal.
mono-spaced bold. For example:
File-related classes includefilesystemfor file systems,filefor files, anddirfor directories. Each class has its own associated set of permissions.
Choose → → from the main menu bar to launch Mouse Preferences. In the Buttons tab, select the Left-handed mouse check box and click to switch the primary mouse button from the left to the right (making the mouse suitable for use in the left hand).To insert a special character into a gedit file, choose → → from the main menu bar. Next, choose → from the Character Map menu bar, type the name of the character in the Search field and click . The character you sought will be highlighted in the Character Table. Double-click this highlighted character to place it in the Text to copy field and then click the button. Now switch back to your document and choose → from the gedit menu bar.
Mono-spaced Bold Italic or Proportional Bold Italic
To connect to a remote machine using ssh, typessh username@domain.nameat a shell prompt. If the remote machine isexample.comand your username on that machine is john, typessh john@example.com.Themount -o remount file-systemcommand remounts the named file system. For example, to remount the/homefile system, the command ismount -o remount /home.To see the version of a currently installed package, use therpm -q packagecommand. It will return a result as follows:package-version-release.
Publican is a DocBook publishing system.
mono-spaced roman and presented thus:
books        Desktop   documentation  drafts  mss    photos   stuff  svn
books_tests  Desktop1  downloads      images  notes  scripts  svgs
mono-spaced bold and the output of a command in mono-spaced roman. Examples:
0 root@cl-head ~ #echo "I'm executed by root on a head-node"I'm executed by root on a head-node
0 root@beo-01 ~ #echo "I'm executed by root on a compute node"I'm executed by root on a compute node
0 root@sn-1 ~ #echo "I'm executed by root on a storage node"I'm executed by root on a storage node
0 user@workstation ~ $echo "I'm executed by user admin on the admins workstation"I'm executed by user admin on the admins workstation
mono-spaced roman but add syntax highlighting as follows:
package org.jboss.book.jca.ex1;
import javax.naming.InitialContext;
public class ExClient
{
public static void main(String args[])
throws Exception
{
InitialContext iniCtx = new InitialContext();
Object ref = iniCtx.lookup("EchoBean");
EchoHome home = (EchoHome) ref;
Echo echo = home.create();
System.out.println("Created Echo");
System.out.println("Echo.echo('Hello') = " + echo.echo("Hello"));
}
}
Note
Important
Warning
qlustar-docs@qlustar.com to report errors or missing pieces in this documentation.
Note
Note
Important
Now compare the such-generated checksum with the value that is published at the above download page. If the checksums are not identical, do not proceed with the installation, since that means the installer is corrupt (either due to hardware errors or a malicious attack). In this case, you should download the image once more. If the problem persists, also after downloading from a different computer, please post the incidence in the support forum.0 user@workstation ~ $sha256sum qlustar-installer.iso.gz
qlustar-installer.iso.gz and that the device name of the drive is /dev/sdb, the following command (executed as root) will load the image to the flash-drive:
0 root@workstation ~ #gunzip -c qlustar-installer.iso.gz | dd of=/dev/sdb
Warning
/dev/sdb! So make sure to find out the correct device name of the drive.
0 root@workstation ~ #tail -f /var/log/kern.log
[sdb] Attached SCSI removable disk
should appear. In this case your USB drive would have the device name /dev/sdb. If the above dd command finished successfully, you can use the drive to install the Qlustar OS on the target machine. This is described in the next paragraph.
Step by step instructions
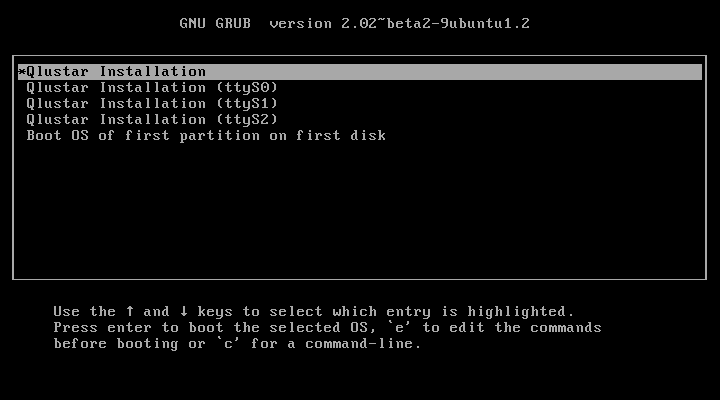
Booting from the USB Drive
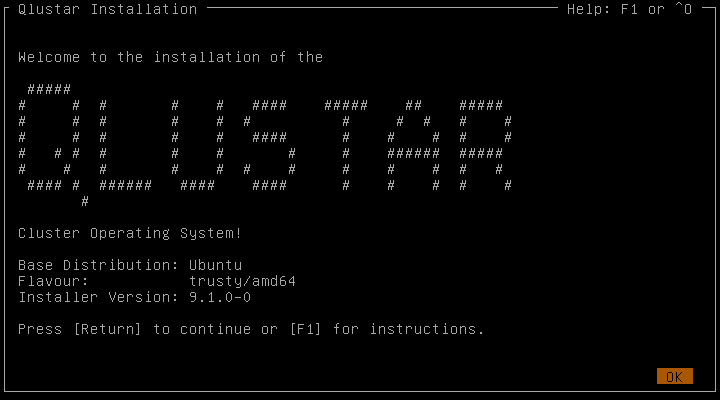
Starting the installation process
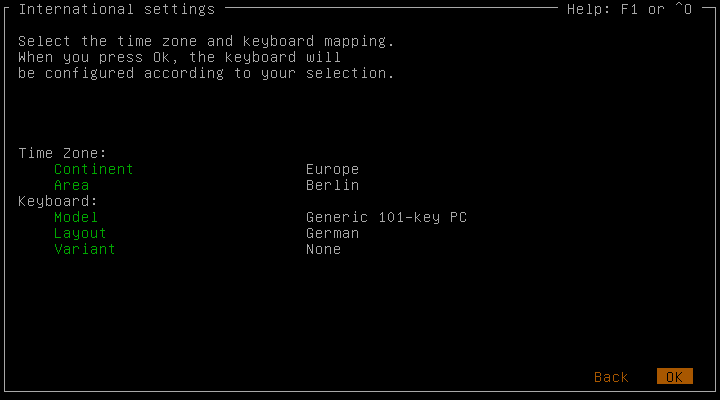
Localization settings
Disk Configuration
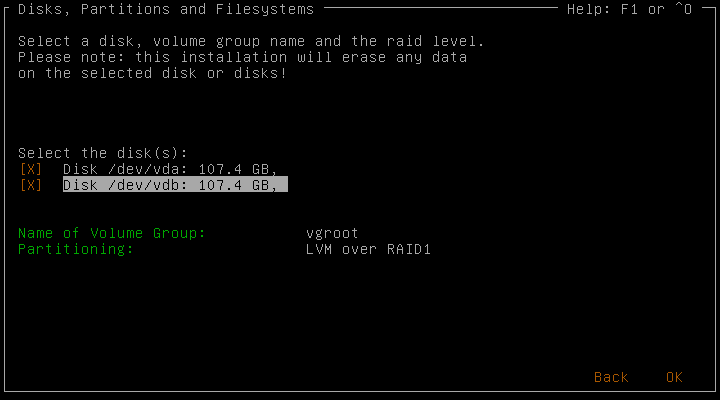
(root, var, tmp, apps) will automatically be created on equally named LVM logical volumes within this volume group.
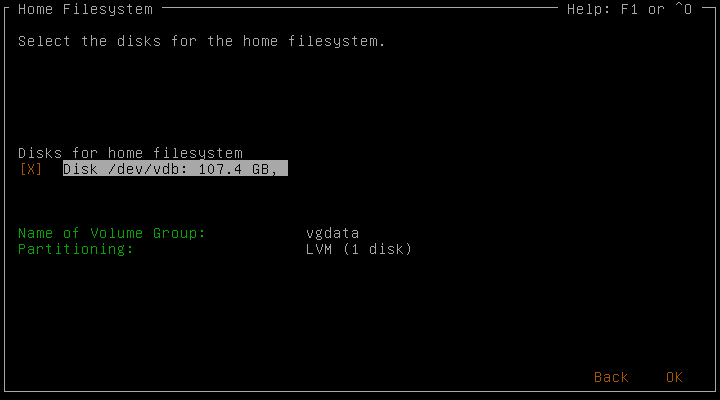
Home File-System
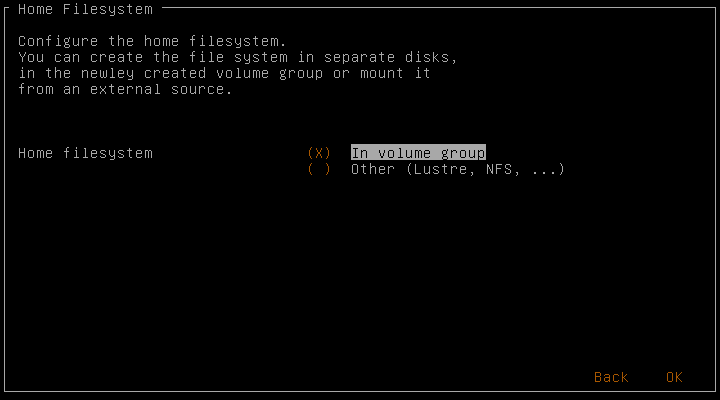
Home File-System on separate Disks

Network Settings (1)
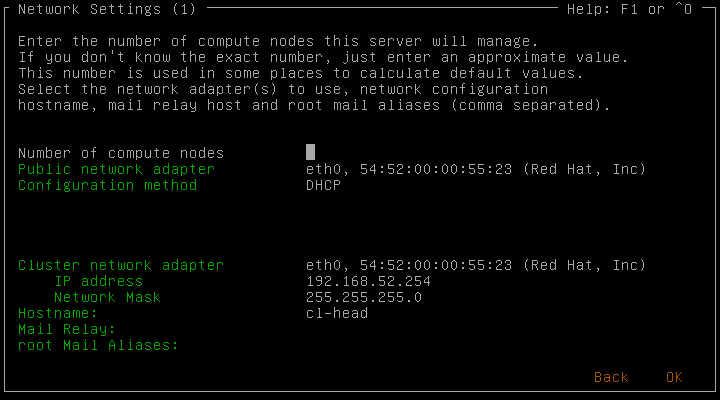
Note
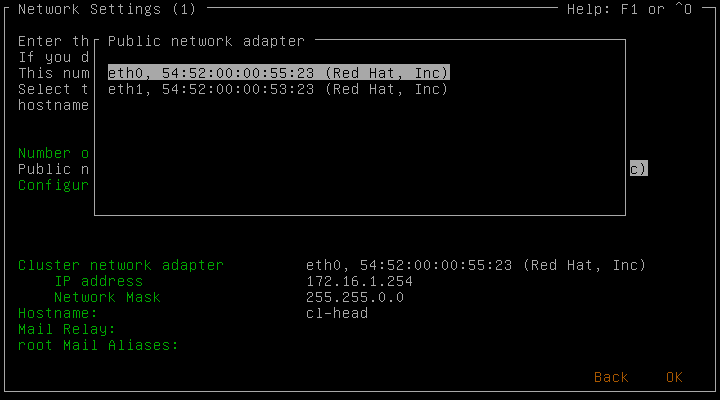
beosrv-c. Note that two network adapters are necessary for proper operation of your cluster.

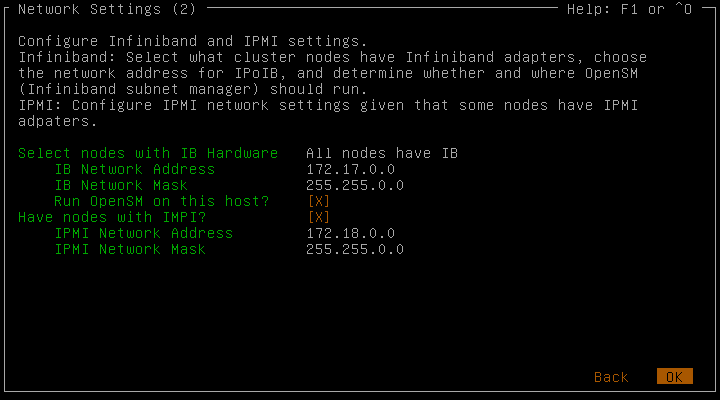
Network Settings (2)
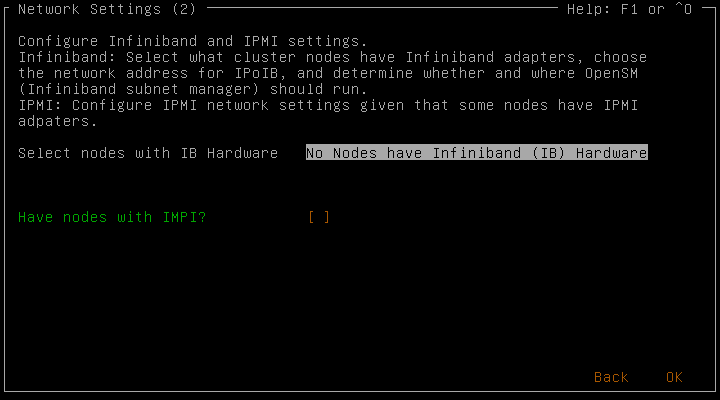
Infiniband (IB) and/or IPMI network parameters, if you have the corresponding hardware in your cluster.
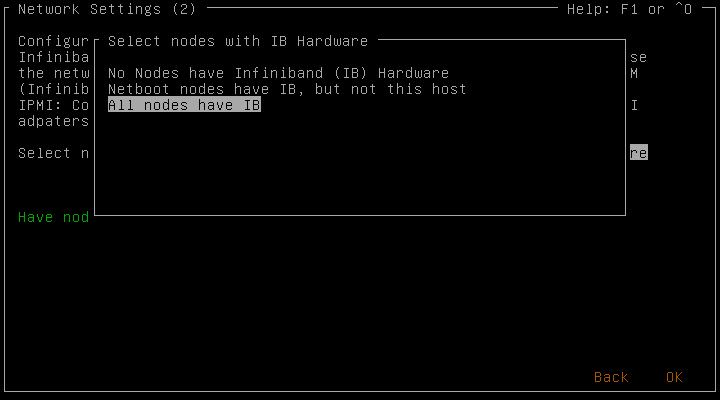
OpenSM (IB subnet manager) on the head-node. Note, that at least one node (or switch) in an IB fabric has to run a subnet manager. Given the value of the IB network address, the host part of the IB adapters IP address will be set from the host part of the Ethernet address of the node in the cluster network. Example: IP cluster network 192.168.52.100 - IP IB network 192.168.53.100.
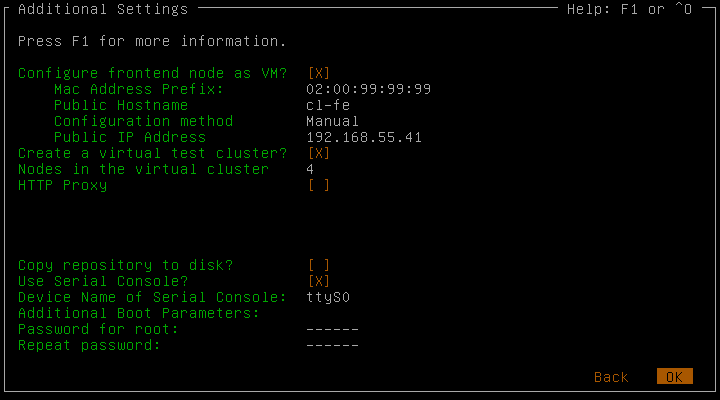
Additional Settings
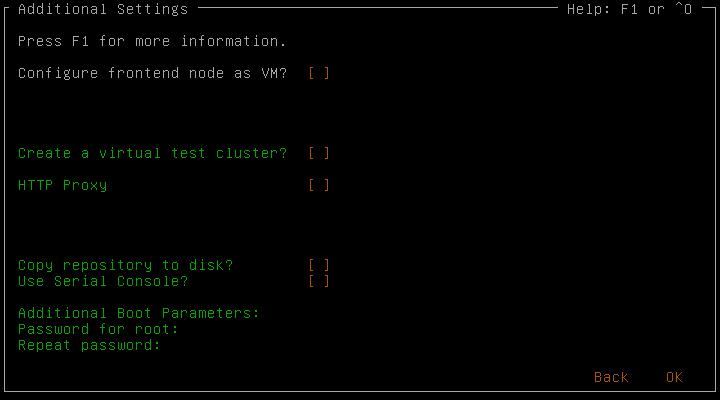
login-c.
Note
Note
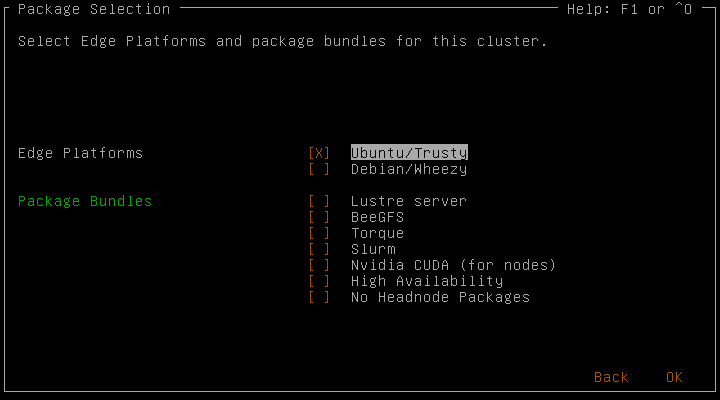
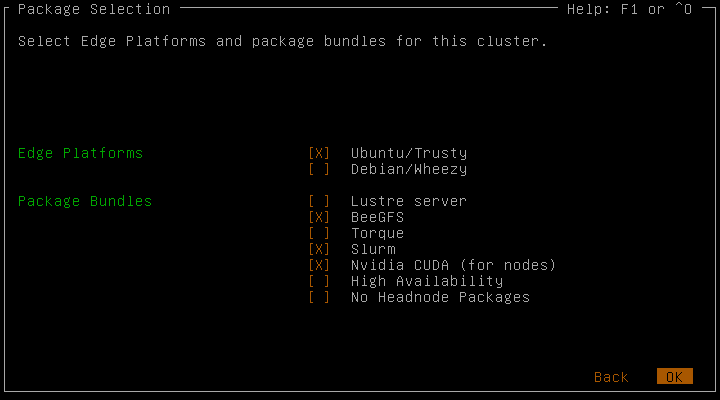
Edge Platform & Package Bundle Selection
Note
Note
Note
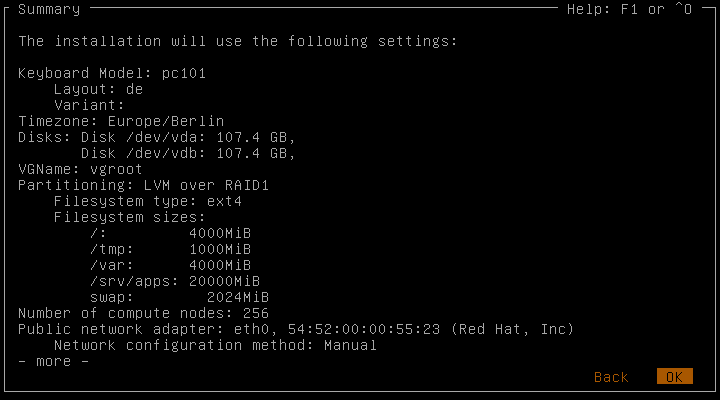
Reviewing Installation Settings
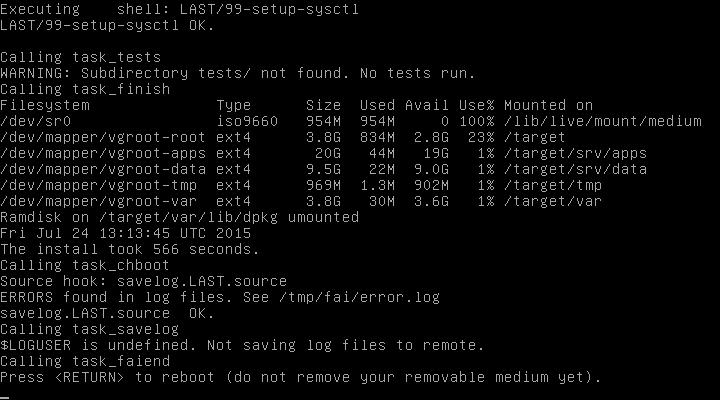
Actual Installation
| Revision History | |||
|---|---|---|---|
| Revision 9.2-0 | Thu Apr 27 2017 | ||
| |||
| Revision 9.1-0 | Thu Jul 24 2015 | ||
| |||