Adding/Configuring Hosts
Adding Hosts
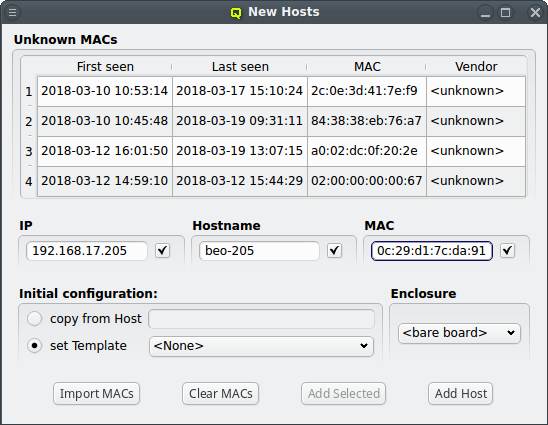
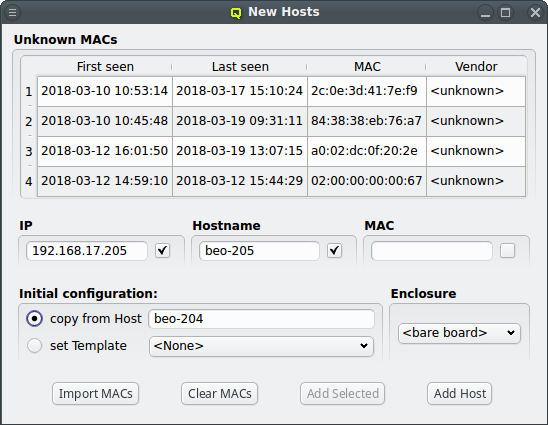
To add new hosts to the cluster you can either select "New Hosts" from the context menu in the Enclosure View tree or from the "Manage Hosts" menu. This opens the "Hosts Window".
Adding a new host requires the specification of an IP address, hostname and MAC in the corresponding three text fields of the dialog. The entered values are checked for their validity. If one of them is not valid, the check-box to its right remains cleared. The tool-tip of the check-box will then show, why it is invalid. If all the values are valid, all check-boxes will show a solid check and the Add Host button will become selectable.
For convenience and if it makes sense, the IP address and the numeric part of the hostname (if there is one) will automatically be incremented by one, after a host was added. So in most cases, these fields will not have to be changed manually to add the next host. Only the new MAC will need to be entered.
To help adding new hosts, qlumand scans the DHCP log file for unknown hosts that have
requested an IP address. For each unknown host found in the logs, the table at the top of the
window shows the time of the first and last appearance in the log, its MAC address as well as
the hardware vendor this MAC is assigned too (if known). Selecting a MAC in the table copies it
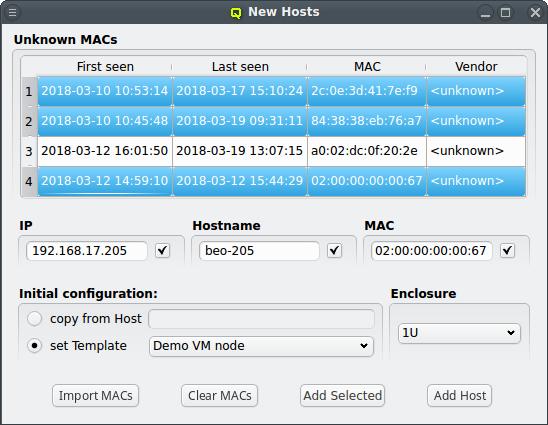
into the MAC text field at the bottom and a double-click adds the host with the
selected MAC. One can also select multiple lines (by holding the Ctrl key and
clicking or holding the Shift key and dragging the mouse) and then click the
Add Selected button at the bottom to add them all using the auto-increment
feature for the IP address and hostname. If unsure, try adding a single host first and check
the auto-increment does the right thing before adding a group of hosts.
One easy way to add groups of hosts is to power them on one at a time with a short delay (say 30 seconds). The hosts will then appear in the Unknown MACs table in the order they were powered on and can be added as a group with the click of a single button.
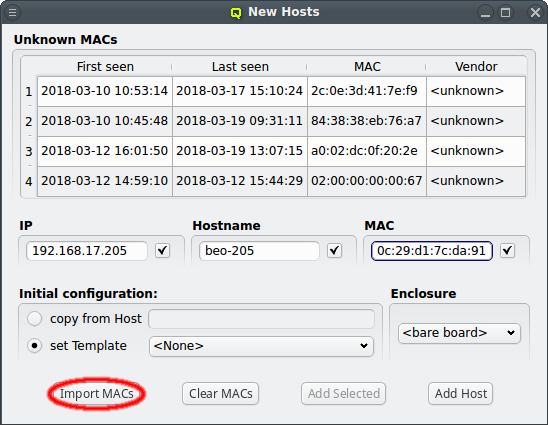
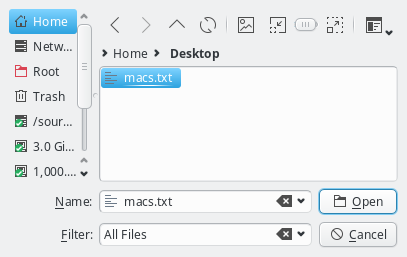
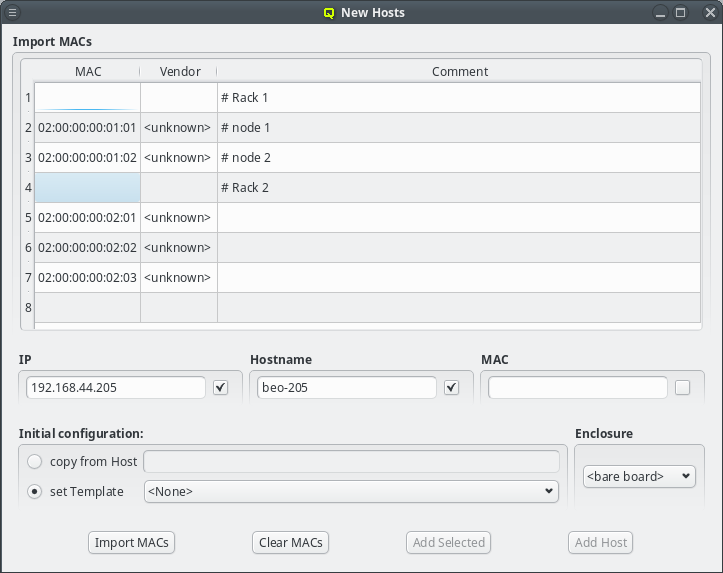
Another option is to import a list of mac addresses from a file by clicking Import MACs. Network switches with a management interface often have an option to list the MAC addresses for each port, so you could capture this list and save it in a file. The file might need some editing to conform to the syntax qluman-qt expects, which is as follows: Lines starting with an '#' and empty lines are treated as comments. Everything else must start with a MAC address in the standard hexadecimal notation using ':' as separator. Any text following the MAC address is displayed in the comment column after importing. Example (see also the corresponding screenshot):
# Rack 1
02:00:00:00:01:01 # node 1
02:00:00:00:01:02 # node 2
# Rack 2
02:00:00:00:02:01
02:00:00:00:02:02
02:00:00:00:02:03
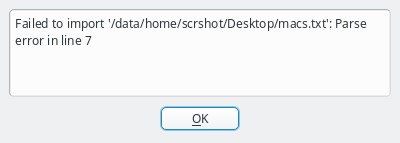
In case the file can not be parsed an error is shown with the line number at which parsing failed. Otherwise the MAC addresses will be shown in place of the unassigned MAC addresses detected by the DHCP server. Adding single hosts or groups of host from the list works the same way as with the detected MACs as described above. Clicking the Clear MACs button clears the imported MACs and returns to the list of MACs detected by the DHCP server.
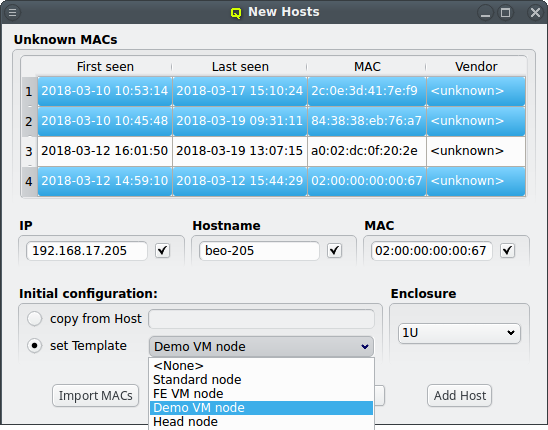
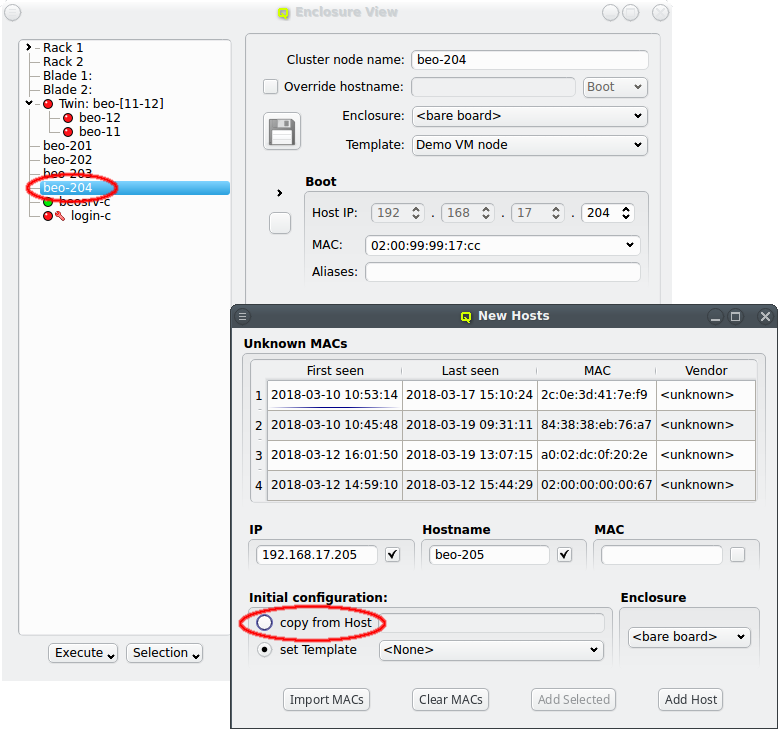
At the bottom of the window a Host Template can be selected that will be used as the default for new hosts. Most of the time, no additional configuration is needed for a new host. As an alternative way to make settings for the new hosts, one can select an existing properly configured host and choose to copy its settings to the new ones.
Configuring Hosts
Four Levels of configuration
The configuration of a host results from the assignment of different types of properties and
Config Classes to it. A property is always a key + value pair. They are further divided into
Generic Properties and Hardware Properties. Generic/hardware properties and config classes
can be individually assigned to a host. This is the configuration level with highest priority,
meaning that such an assignment will always be effective.
They can also be used to define Generic Property Sets, Hardware Property Sets and Config
Sets. This is simply a means of grouping them together, so they can be used as a single
entity. These sets may also be individually assigned to a host. This is the configuration level
with second highest priority.
The third level of configuration are Host Templates. A Host Template consists of exactly one
Config Set, one Generic Property Set and one Hardware Property Set.
The fourth and most generic level of configuration is the Global Template. It applies to all
hosts in the cluster and consists of the Global Generic/Hardware Property and Config Set. In
principle, the latter are just like any other set, with the one difference that they always
apply to all hosts. This is useful when defining a base configuration for a cluster.
If a generic/hardware property or config is defined and assigned to a host in a particular hierarchy level, it overwrites the corresponding assignment(s)/value(s) from all lower priority levels. This introduces a lot of flexibility while retaining consistency.
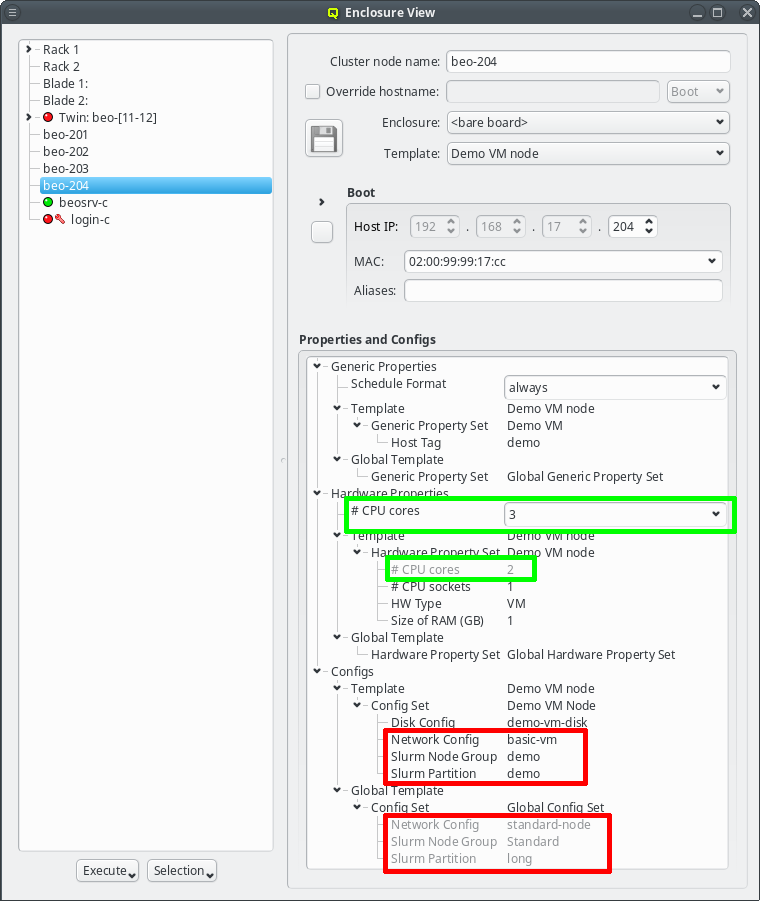
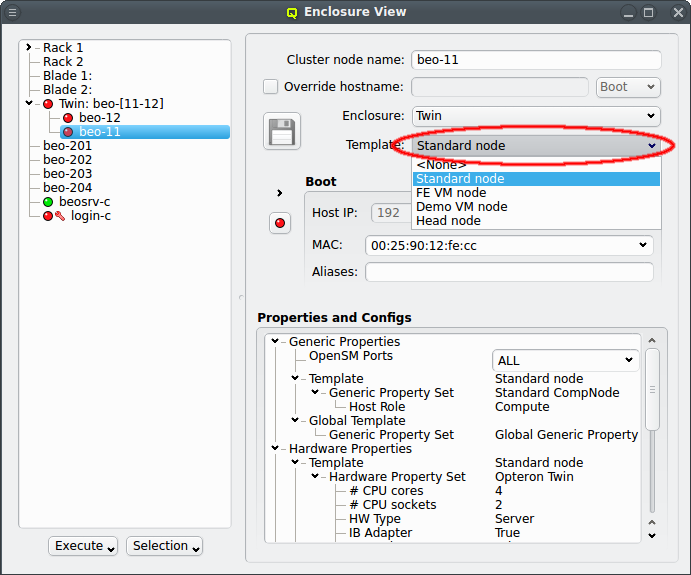
For example it allows setting a property in the Global Template that is right for most hosts
and then replace it in a particular Host Template being used for a few exceptional hosts. The
screen-shot shows two examples of this strategy: The assigned Host Template of the chosen host
replaces the configs for Net Config, Slurm Partition and Slurm Node Group of the Global
Template (red box) and the number of CPU cores is directly assigned replacing the value from
the Host Template (green box).
|
The tree representation of a host’s properties/configs in the Enclosure View clearly indicates overwritten assignments by displaying them in a light gray. |
Generic and Hardware Properties
Hardware Properties
Hardware Properties are used to describe the hardware of a host. Among others, hardware
properties like the amount of RAM or number of CPU cores are used to configure the Slurm
workload manager, so jobs can be assigned to the desired hosts. Others, like e.g. the HW type,
are purely informational and might be used for inventory management.
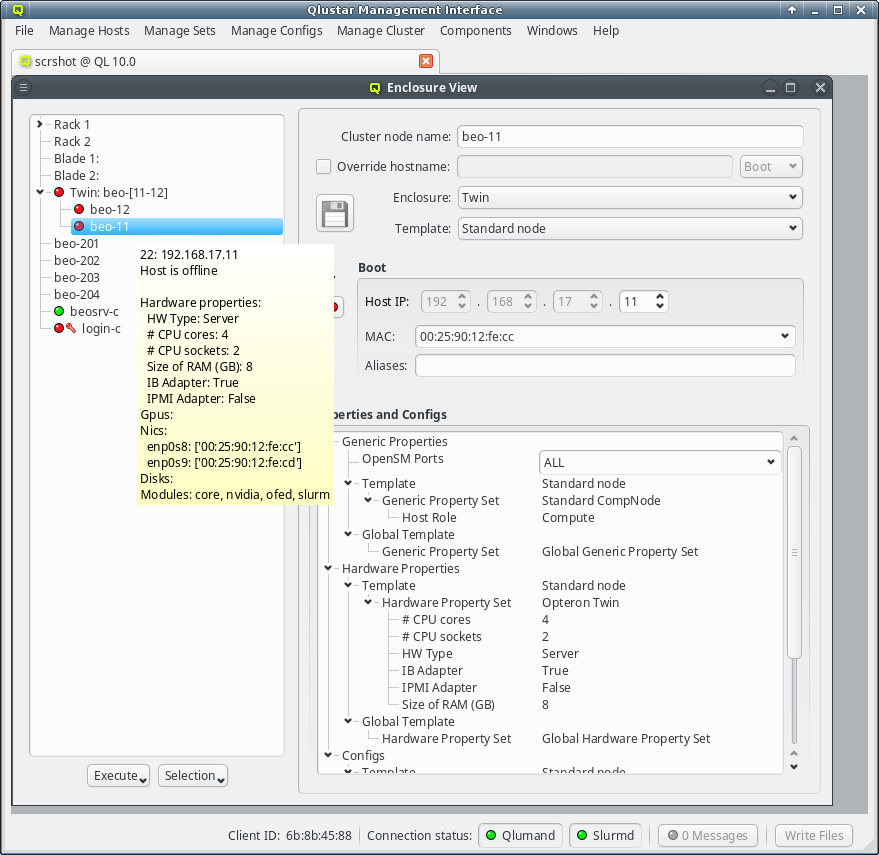
Hardware Properties usually don’t have to be entered by hand. When a host boots, the basic
hardware properties are detected and reported to the server. They are shown as a tool-tip in
the Enclosure View when hovering over a host. The Hardware Wizard uses the
reported values to create the correct configuration for a set of hosts and is the best way to
create their initial configuration. It can also be used to correct the configuration of hosts
in case their hardware was changed.
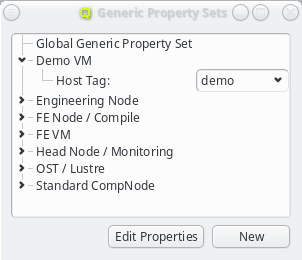
Generic Properties
A property that is not hardware related is called generic. Generic Properties can be
configuration options, like OpenSM Host, or purely informational, like Paid by. While
hardware properties are meant to be more rigid, typically with a configurable set of fixed
values, generic properties are more flexible and can be defined at will. Generic Properties
are also not necessarily unique, making it possible to assign multiple values for a single
generic property. This is useful e.g. to put hosts in multiple groups for dsh/pdsh (via the
'Host tag').
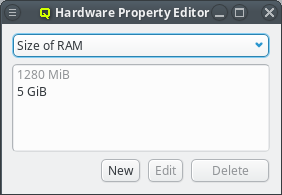
Generic/Hardware properties and their values are managed by the corresponding Property
Editor. It is reachable from the Generic/Hardware Property Sets windows. A new
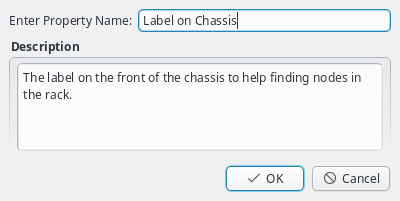
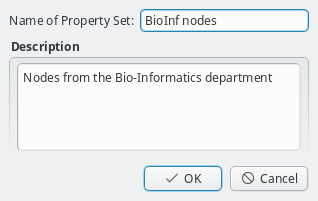
Generic/Hardware property can be created by clicking the New button. Each
property has a name and a description. The name must be unique and the Ok button
will only be enabled if that is the case. The description is optional and will be shown as a
tool-tip when hovering over the property in other windows.
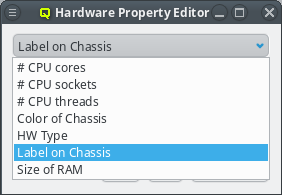
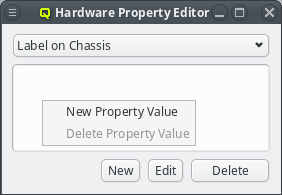
Once a property exists, values can be added to it. To accomplish this, the property must first be selected from the drop-down menu at the top of the Property Editor. Then values may be added or deleted using the context-menu.
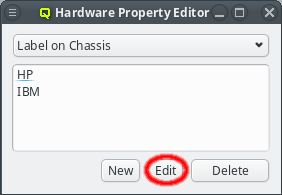
With the exception of essential pre-defined properties, a property can be edited by clicking
the Edit button. Examples of properties that can not be edited (or deleted) are
the ones used to generate the slurm.conf. Changing their name would lead to errors in the
generated file. Similarly, some property values can not be deleted and will be shown
grayed out.
Property/Config Sets

Generic/hardware sets and config sets simplify the configuration of hosts substantially. They
are a means of grouping generic/hardware properties or configs, so they can be used as a single
entity and be assigned to individual hosts directly or via a Host Template. There is also a
global set of each type which is always assigned to every host. The generic/hardware and
config sets can be managed by opening the corresponding window from the Manage Sets menu.
Hardware/Generic Property Sets
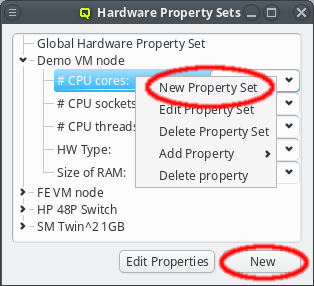
Property sets are shown in tree form with the name of each set as the top level item and the key/value pairs of assigned properties as children. The first entry is always the global property set. A new property set can be created by clicking the New button or from the context menu. An existing property set can be renamed or the description changed by selecting Edit Property Set from the context menu. Deletion of an unused property set is also possible via the context menu.
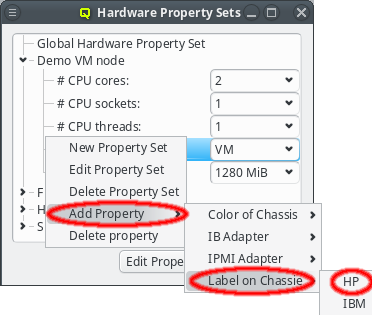
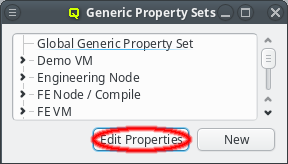
New properties can be added to a property set by opening the Add Property sub-menu in the context menu: Select the desired property and its value. Only properties and values that don’t conflict with already included properties or values are shown in the sub-menu. Already included properties may be changed in two ways: Either a different value is selected from the drop-down menu or the value is edited directly, in which case the change must be confirmed by pressing Enter. If the entered value for the property doesn’t exist yet, a new value is automatically created. Another way to create new values and the only way to delete them is through the property editor by clicking Edit Properties.
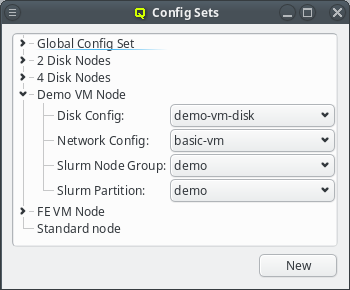
Config
Sets
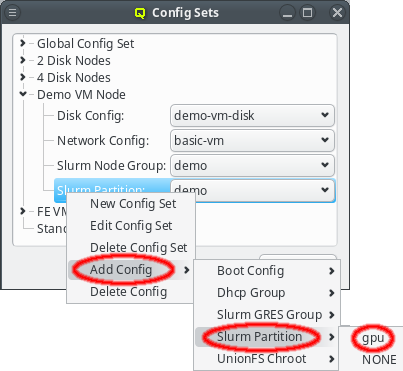
Config sets are managed the same way as property sets. They are displayed as a tree with the global set at the top and the key/value pairs of assigned config classes as children. Creating a new config set can be done by clicking the New button or from the context menu just like for property sets. Adding and removing config classes to/from a set also works the same way.
Unlike property sets though, the list of usable config classes is fixed and values can not be
edited directly from this window. Config classes require a more
complex and individual config. So for each config class there is a menu item in the
Manage Configs menu. Depending on the type of config class, one or more values
for that class can be assigned to a Config Set (slurm partitions are an example where
multiple values are assignable).
|
The sub-menu only shows config classes and values that can be added without conflicting with already assigned entries. |
Assigning a configuration to hosts
As mentioned in the beginning of this chapter there are 4 levels of configuration. Going from
lowest to highest priority these are: Global Template, Host Template, directly assigned
sets and directly assigned properties and configs.
Global Template
The Global Template is the most generic way to assign configurations to hosts. It applies to
all hosts in the cluster and consists of the Global Generic/Hardware Property and Config Set.
Host Templates
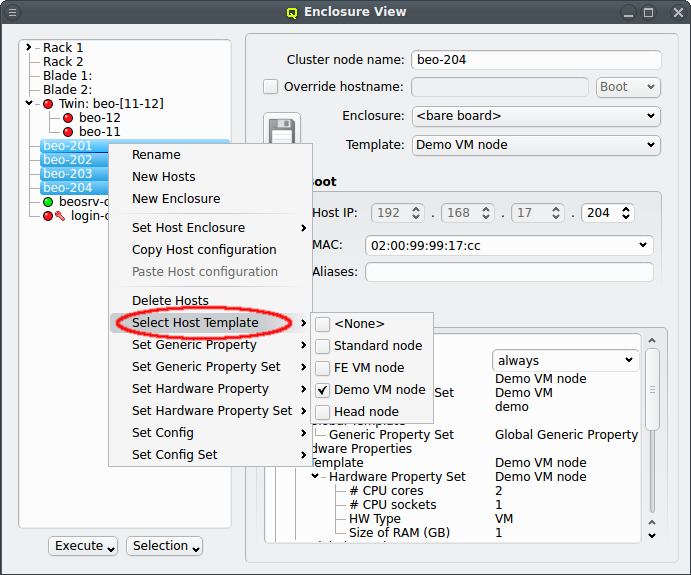
The next level of configuration is the Host Template. When a correct Host Template exists,
a host can be configured by selecting the desired template in the Enclosure View window. For
a single host, this can be done by selecting it in the tree view. This brings up the host
information on the right and a template can be selected from the drop-down menu. To configure
multiple hosts, you would select them in the tree view and choose a Host Template from the
context menu. The check-marks in the sub-menu indicate which Host Templates are currently
assigned (if any) for the selected nodes. This action will override the previous assignment for
all selected hosts.
Alternatively, especially when no correct Host Template exists yet, the Hardware Wizard can be used to to create a new or modify an existing Host Template and
assign it to hosts.
Directly assigned properties, configs and sets
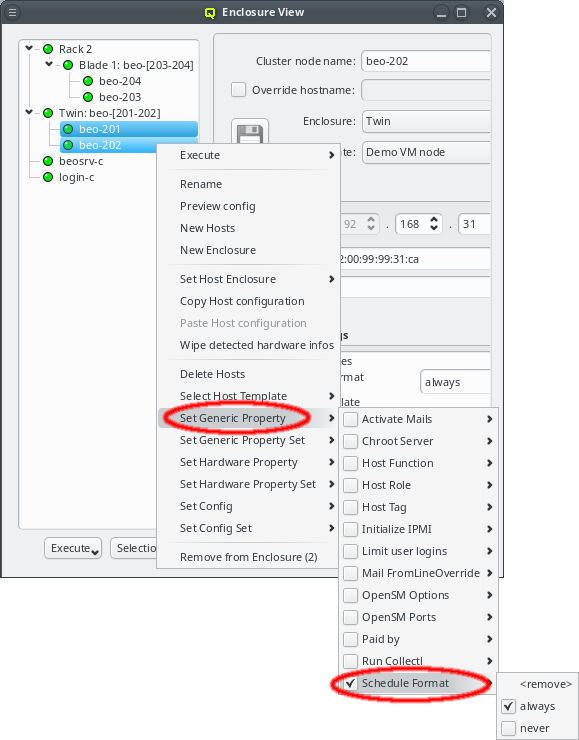
Generic/hardware properties, configs and their corresponding sets can also be individually assigned to a host. Such assigned properties take precedence over ones of the same type selected through the Host or Global Template. This is useful when a particular (or a few) node(s) require a special property/config (set) while everything else should be set the same as for other hosts with the same template.
|
By default, every new host has the generic property |