Common Config Classes
Overview
Config Classes manage configurations that are too complex to fit into the key + value scheme
used by properties. Therefore, there is no common interface to configure all classes. Instead,
each class has its own configuration dialog, presenting the specific options it
provides. Furthermore, some classes depend on sub-classes (e.g. Boot Configs depend on
Qlustar Images). Only the top-level Config Classes are directly assignable to a Config
Set or a host. Sub-classes are assigned indirectly via their parent class. Most of the
functional subsystems of Qlustar have a dedicated Config Class. Currently, there are five of
them: Network, Boot, DHCP, Disk, and Slurm Configs (Slurm is optional) complemented
by a single sub-class, Qlustar Images. Please note that the Network Configs has already
been described in a previous chapter
Writing Config Files
Many of the configurations managed in the QluMan GUI via Config Classes and sub-classes are
translated into automatically generated configuration files located in the filesystem of the
head-node(s). While QluMan configuration options are usually saved in the QluMan database
immediately after they have been entered in the GUI, the write process of the real
configuration files on disk is a separate step, that needs to be explicitly initiated and
confirmed.
Each configuration dialog of a Config Class has a Preview button that opens the Write
Files window with its own config files already expanded. If a Config Class has no pending
changes, the Preview button becomes a View button, while its function remains the
same.
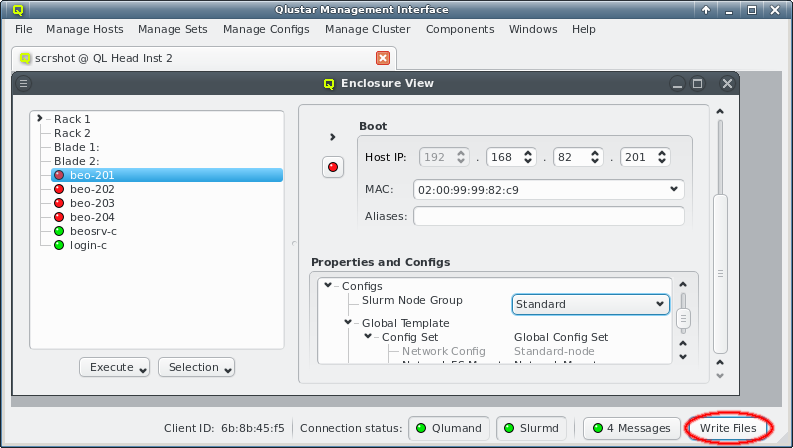
The Write Files window can also be opened from or via the
Write Files button at the bottom right of the main window. This button is an indicator
for the presence of pending changes: It is grayed out if there aren’t any, and fully visible
otherwise.
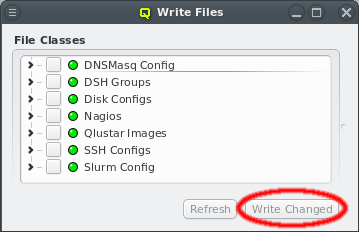
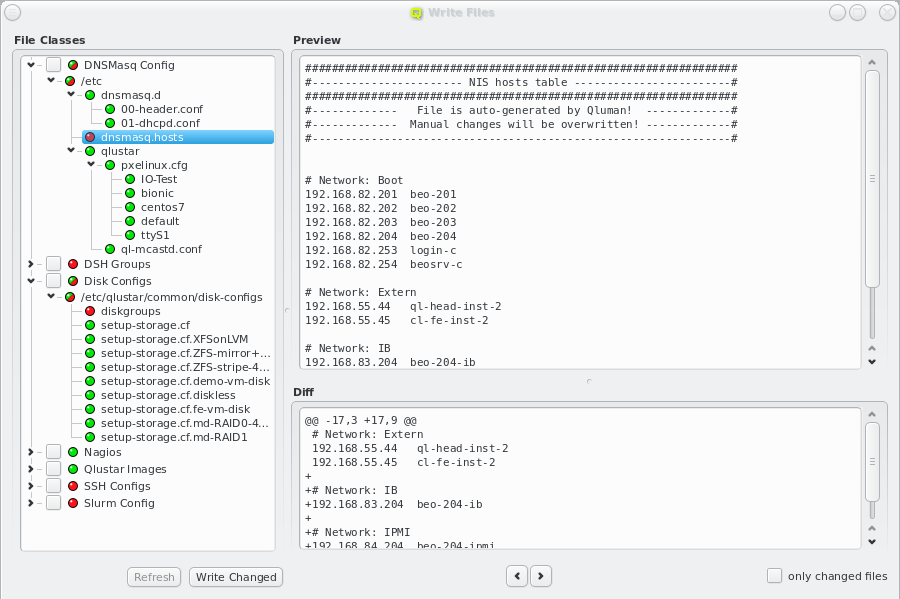
When the Write Files window is opened, on the left it shows the list of all QluMan Config
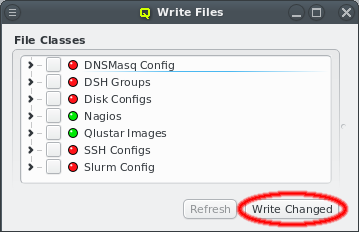
Classes that may be written. Each Config Class has a status LED. It is red if there are
changes pending to be written, otherwise green. The files of all Config Classes with pending
changes can be written by clicking the Write Changed button at the bottom. It
will be grayed out if there are no changes.
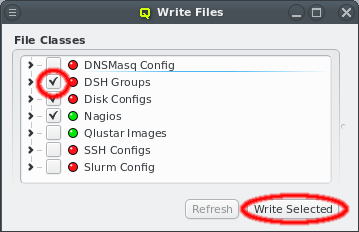
Config Classes can also be written individually by setting the check-mark before each
class. This converts the button at the bottom to Write Selected. Pressing it will
then write the files of all checked classes regardless of whether they have changes or not.
|
Writing a |
|
The actual write command is performed via the Qlustar RXengine. This allows for consistent management of multiple head-nodes e.g. in a high-availability configuration. |
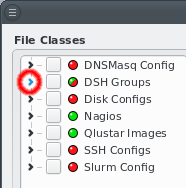
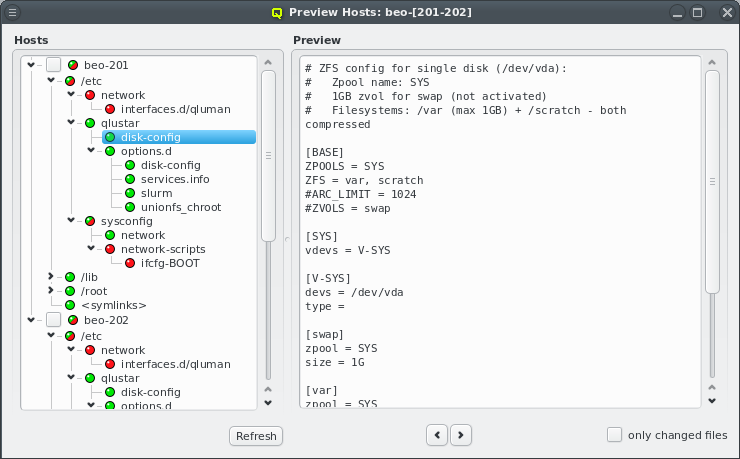
Before writing the generated files for each Config Class, they can be inspected by expanding
their entry in the tree view. Under the hood, this expansion initiates a request by the GUI to
the QluMan server, asking to send the generated files together with a diff against the current
files on disk. For the latter to work, the execd on the Headnode needs to be up and running.
The generated files are shown in a tree structure where nodes represent directories and leafs the individual files. For compactness, directories with only one entry are combined

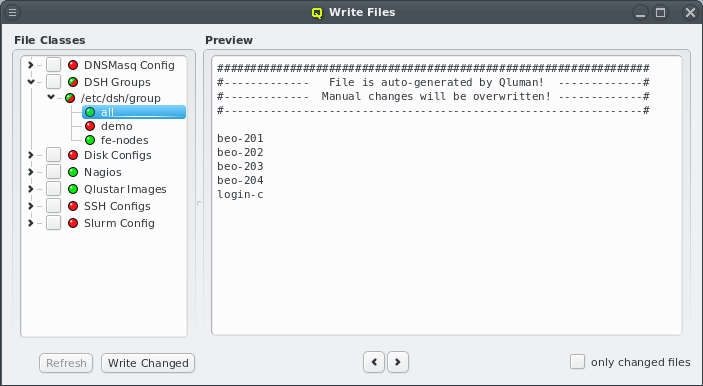
into a single node. Each entry has its own status LED. It’s red if there are changes pending to be written, otherwise green. A red-green LED is shown if some files in a directory have changes and some do not. Selecting a file will show its contents on the right. If changes are pending, a diff of the changes will also be shown below that.

Besides selecting files from the tree, there is also a second method of navigating between files. At the bottom of the right side, there are two arrow buttons that will switch to the previous and next file in the tree respectively. This allows to quickly browse through all files with single clicks without having to move the mouse. Per default, the Prev and Next buttons will cycle through all files. After checking the Only changed files checkbox, only files with pending changes will be switched to.
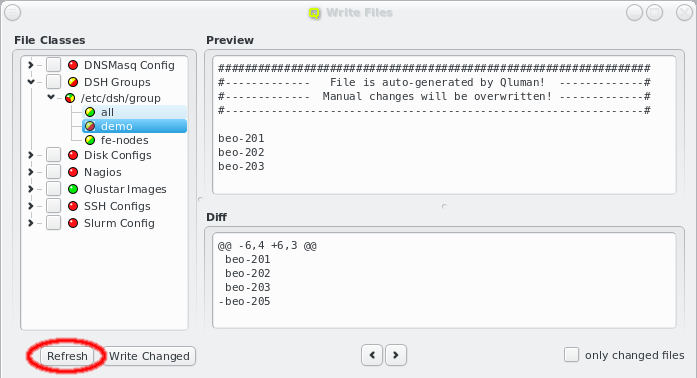
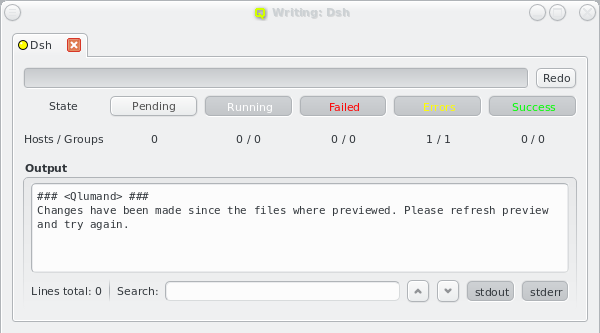
While the Write Files window is open, further changes may have been made to the cluster
configuration, either by the current user or another one. The Write Files window will detect
this. As a result, a yellow component will be added to all LEDs and the Refresh
button at the bottom be activated . Until the latter is clicked, the displayed information will
not reflect the latest changes and trying to write will also fail with an error message. This
is to prevent the activation of files with a content that is different from what has been
previewed.
|
Generating the files for each This delay reduces the load on the server if multiple changes are made within a short time. The
downside of it is that the LEDs can turn red or yellow for a short time, even though no actual
change exists. Clicking the Refresh button in this situation will abort the delay
and generate the files for each |
Host-specific Configs
Various configurations managed in the QluMan GUI via Config Classes and sub-classes
translate into automatically generated configuration files for the individual hosts. In the
pre-systemd phase of their boot process, these files will be sent to them and written by their
execd. At this stage, there is no general update mechanism concerning these files for running
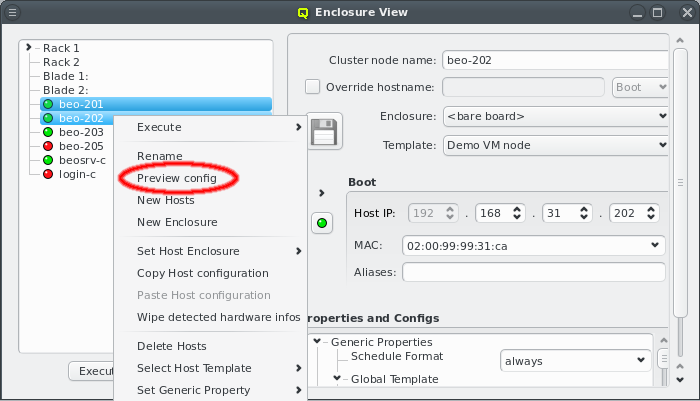
nodes and changes only take effect during the next boot. A preview of the generated configs can
be initiated by selecting Preview config from the host’s context menu. More than
one host may be selected for this.
|
Changes to the current config files of a host will only be shown if the host is online. If the host is offline (for example due to network problems) but not powered down, possible changes might not be shown. |
Boot Configs
The Boot Config dialog allows to define settings for the PXE/tftp boot server. A boot
configuration determines which Qlustar OS image is delivered to a
node, and optionally permits the specification of PXELinux commands and/or Linux kernel
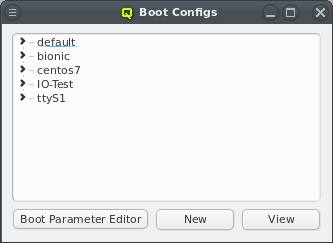
parameters. When opened, the Boot Config window shows a collapsed tree-list of all boot
configs currently defined, sorted by their names.
|
Note that the |
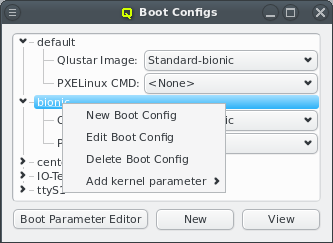
By expanding a Boot Config item, the configured Qlustar image, PXELinux command, and kernel
parameters become visible. You can change any of the values, by simply selecting a different
option from the drop-down menus. In case of kernel parameters, you can also directly edit the
entry and save the result by pressing Enter. Furthermore, it is possible to add
multiple kernel parameters or remove them through the context menu. Each selected kernel
parameter will be added to the kernel command line.
The context menu also lets you create new Boot Configs and edit or delete an
existing one. Alternatively, a new Boot Config can be created by clicking the
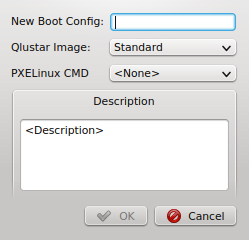
New button at the bottom of the dialog. Both, the context menu and the button
bring up the New Boot Config dialog. Simply enter the name and description for the new
config, select a Qlustar image and (optionally) a PXELinux command. Finally press
OK to create it. The new config will then appear in the Boot Config window and
will be ready for use.
Pressing the Boot Parameter Editor button at the bottom of the dialog, will bring up a small edit dialog, where kernel parameters can be created, edited, or deleted.
Disk Configs
Qlustar has a powerful mechanism to manage the configuration of disks on a node. It basically allows for any automatic setup of your hard drives including any ZFS/zpool variant, kernel software RAID (md) and LVM setups.
Since the OS of a Qlustar net-boot node is always running from RAM, a disk-less configuration is obviously also possible. Valid disk configurations require definitions for two filesystems /var and /scratch, swap space is optional (see examples). To permit the initial formatting of a new disk configuration on a node, it must have assigned the Schedule Format: always generic property during the initial boot.
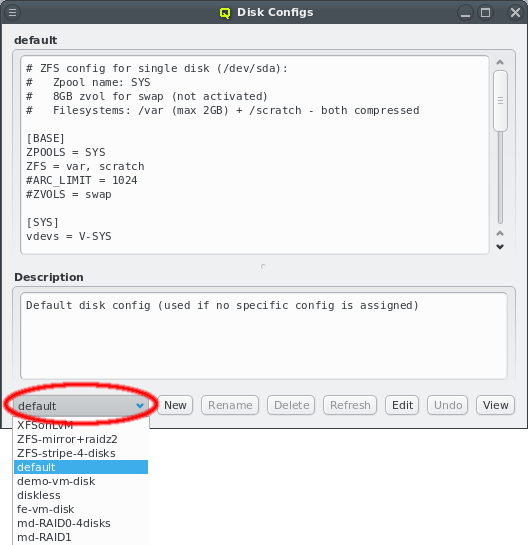
Disk configurations can be managed using the Disk Configs dialog accessible from the main
menu . You can select the config to be viewed/edited from the
drop-down menu at the bottom left. A couple of example configurations are created during the
installation. Note that there are two special configs: (a) disk-less (not editable or
deletable) and (b) default (editable but not deletable). The default config is used for any
node that doesn’t have a specific assignment to a disk config (via a Host Template, config
set).
The configuration itself can be edited in the text field at the top of the dialog. New configs can be created by choosing New disk config from the drop-down menu. As usual, enter the name of the new config in the text field and fill in the contents and description.
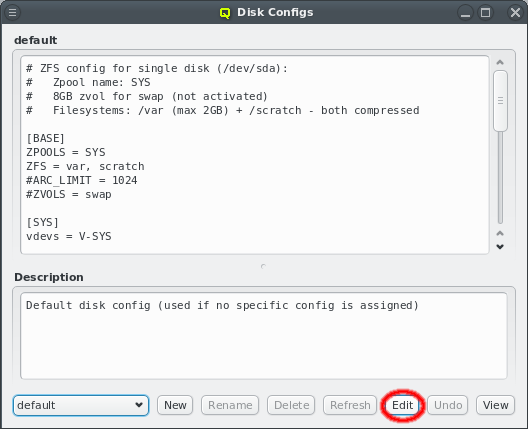
To prevent multiple QluMan users from editing the same config simultaneously and overwriting each others changes accidentally, a lock must be acquired for the template by clicking the Edit button. If another user is already editing the config, the button will be ghosted and the tool-tip will show which user is holding a lock for it.
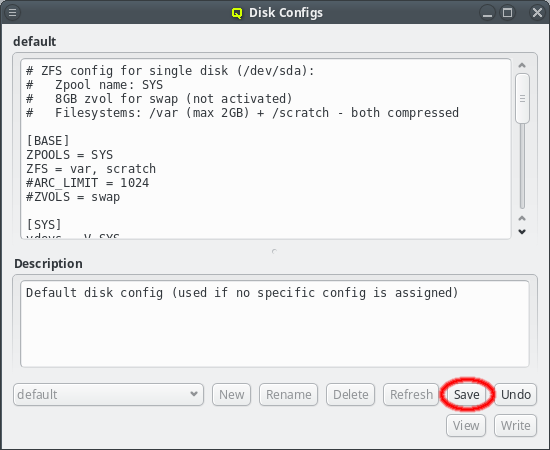
After having finished editing a template, don’t forget to save your changes by clicking the Save button. It will be ghosted, if there is nothing to save. You can undo all your changes up to the last time the template was saved by clicking the Undo button. In case another admin has made changes to a disk config while you are viewing or editing it, the Refresh button will become enabled. By clicking it, the updated disk config is shown and you loose any unsaved changes you have already made in your own edit field. To delete a disk config click the Delete button.

The template lock expires automatically after some time without activity so that the template is not dead-locked if someone forgets to release the lock. In such a case an info dialog will pop up to notify you about it. By selecting OK a new lock will be requested. If another user is starting to edit the template at exactly that time though, the request will fail and an error dialog will inform you of the failure.
Network Filesystem Exports/Mounts
QluMan also supports the configuration and management of Network Filesystem (FS) and bind mounts for cluster nodes. The setup for this consists of two parts:
-
For a network FS, a
Filesystem Exportsresource must be defined using the dialog at Manage Cluster→Filesystem Exports. -
A
Network FS Mountsconfig must be created using the dialog at .
Such a config may contain multiple network and bind mount definitions. As with other config classes, once defined, it can be assigned to nodes through the Global or a Host Template, Config Set or direct assignment.
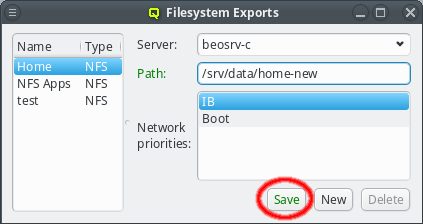
Filesystem Exports
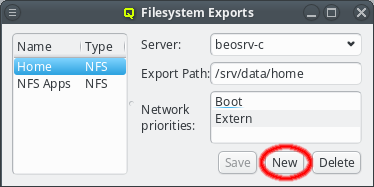
The Filesystem Exports dialog shows the list of exported filesystems by name and FS
type. Selecting an entry will show the details for this FS export on the right. A new
Filesystem Exports resource can be added by clicking the New button. This
requires choosing a unique name that will be used inside QluMan to identify the resource. The
Resource Name field will turn green if the entered name is unique. QluMan currently supports
three types of network filesystems: NFS, Lustre and BeeGFS. The FS type of the resource
can be selected from the drop-down menu.
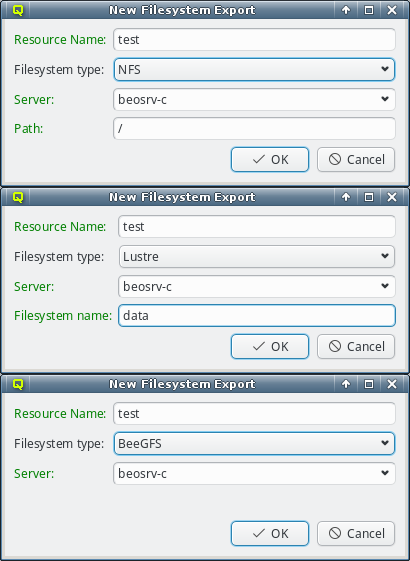
Next the server exporting the FS has to be selected. The default is beosrv-c, the cluster-internal hostname of the head-node, as the most likely server to export a FS. Using the drop-down menu, the server can be selected from a list of servers already used for other exports. To use a new server, the name has to be entered manually. It can be any hostname known to Qluman. The Server label will turn green if the entered name is a known host. This includes all nodes configured in the Enclosure View and any cluster-external host defined in .
|
For a |
|
For a |
The remaining options depend on the selected FS type. In case of NFS, the path of the FS to
be exported on the server has to be entered. Because the path will later be used in a systemd
mount unit file, there are some restrictions on the syntax. For example the path must start
with a "/" and must not have a trailing "/". The Path label will turn green if
the entered path is acceptable, otherwise it will turn red.
For a Lustre resource, the Lustre FS name has to be specified. Lustre limits this name to
eight characters and again, to avoid complications in the systemd mount unit file later, only
alphanumeric characters and some punctuation will be accepted.
In the case of BeeGFS, you have the option to define the TCP and UDP ports on which the
management server listens for this FS resource. If the management server manages just one
BeeGFS FS, the default ports are usually fine.
Once all fields are entered correctly, the OK button will be enabled and the
export definition can be added. It will then appear in the Filesystem Exports window.
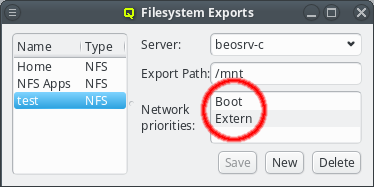
Qluman automatically adds the networks available on the selected server(s) to the Network
priorities. Later, when a node boots and requests its config files from the head-node, the
networks available on the client are checked against this list and the first common entry is
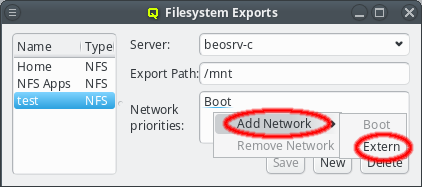
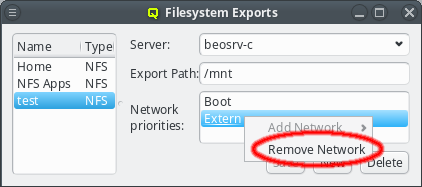
used for the network path via which the FS will be mounted. Shown entries can be removed or
additional networks added from the context menu. Entries can also be moved up or down using
drag&drop. This is useful e.g. to ensure that an NFS export is mounted via Infiniband/RDMA on
all hosts that are connected to the IB fabric and via Ethernet on nodes without IB.
|
If the selected server is cluster-external, it will obviously not have a choice of network priorities. |
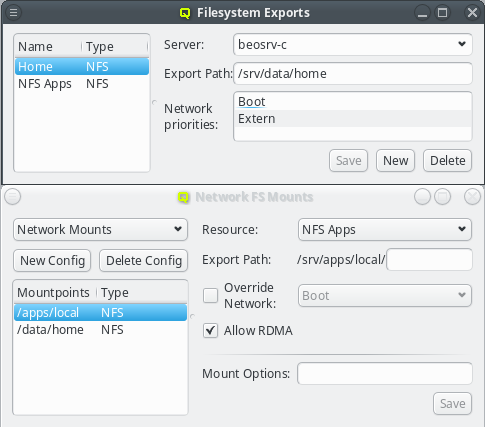
Network Filesystem Mounts
Once Filesystem Exports have been defined, they can be used to configure Network FS Mounts
configs. Each config is a collection of filesystems mounts combined with their mount
options. As usual, such a config can be assigned to hosts either directly or indirectly through
a template. Only one Network FS Mounts config can be assigned per host, so all mounts that
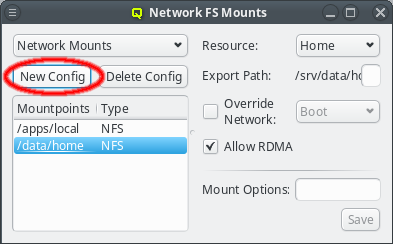
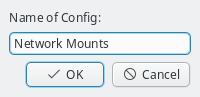
should be available on the booted node must be added to it. Click the New Config
button to create a new Network FSMounts config.
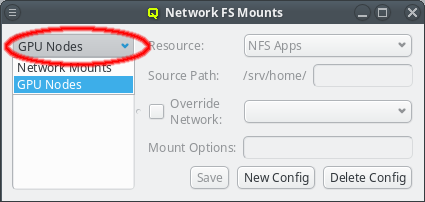
A newly created Network FS Mounts config will be automatically selected for viewing and
editing. Previously defined configs may be selected from the drop-down menu in the top
left. Below that, the list of mountpoints for the selected config is shown along with the FS
type for each mount. Selecting one of the mountpoints will show its configuration details on
the right.
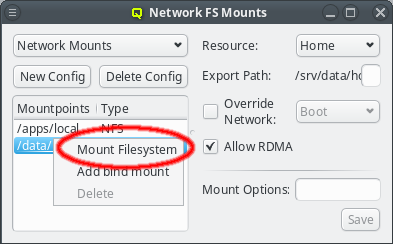
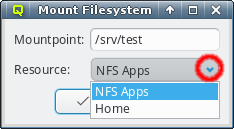
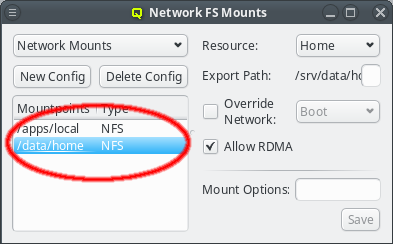
A mount definition can be deleted or a new one added to the config from the context menu. To
define a new one, enter the path where the FS should be mounted in the Mount Filesystem
dialog. Also select one of the Filesystem Exports resources declared earlier from the
drop-down menu. In most cases this information is already sufficient. The next time when a node
assigned to this Network FS Mounts config boots, it will mount this FS.
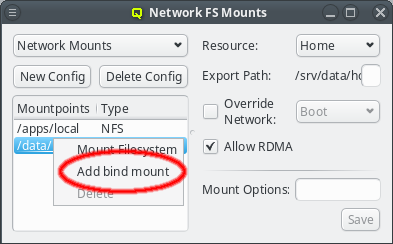
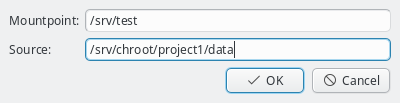
A bind mount can be added in a similar way. However, instead of selecting an external resource to be mounted, the source path of the bind has to be specified. QluMan is unable to verify the existence of the specified, so it is worth to double check before adding the bind mount config.
Advanced common mount options
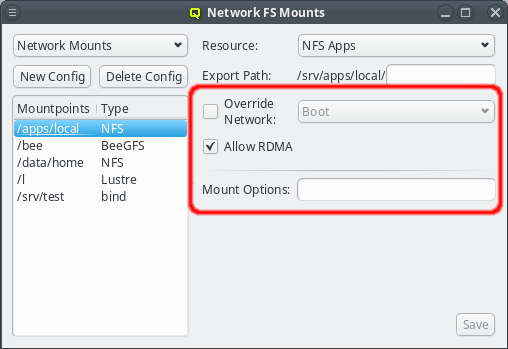
To set special options for a FS mount, first select the corresponding mountpoint from the list on the left. Once selected there are advanced options that can be set common to all FS types (except bind mounts have even less).
-
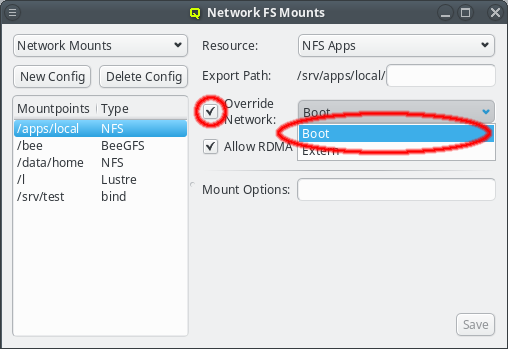
The automatic selection of the network used to mount the FS may be overridden. First the override must be activated by setting the check-mark for Override Network. A network can then be selected from the drop-down menu to force the mount to use this particular one regardless of what the network priorities of the associated export resource say.
-
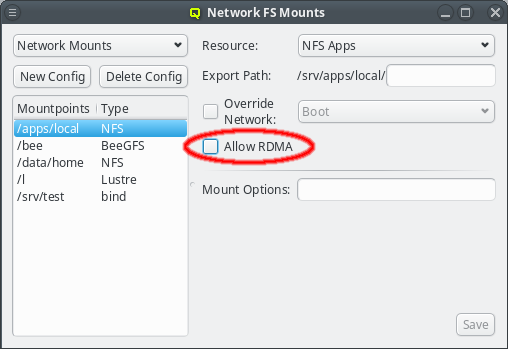
Qluman will automatically detect if an IB network is being used to mount a Network FS and will use RDMA (remote direct memory access) for improved performance at lower CPU load. To mount a Network FS without using RDMA that feature has to be disabled for the mount by clearing the Allow RDMA checkbox.
-
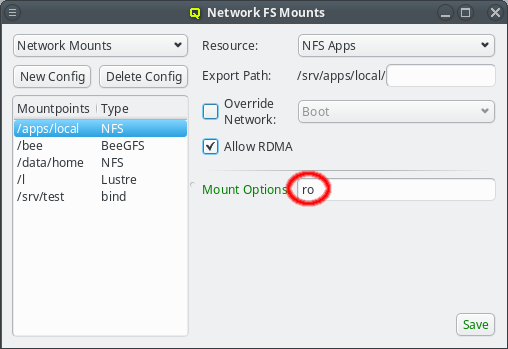
Last, any option that the mount command accepts for a mount can be set in the Mount Options field. There are too many of them to explain them all here. Please refer to
man mountfor the full list of possible options and their meaning.
After editing either the the mount options, be sure to press Enter, or click the Save button to save the changes.
|
Filesystems are only mounted on boot. Any changes made to a |
Advanced NFS mount options
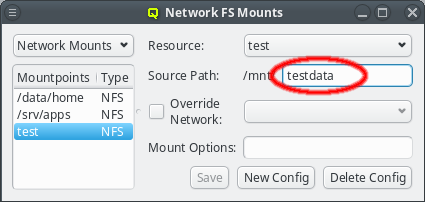
For NFS filesystems a sub-directory can be added to the Source Path to mount
just a part of the exported FS.
There are also a number of custom mount options specific to NFS. Please refer to man nfs
for the full list of possible options and their meaning. After editing either the source path
or the mount options, be sure to press Enter, or click the Save button to save the
changes.
Advanced Lustre mount options
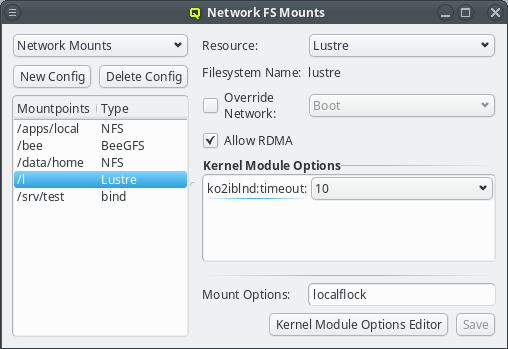
For Lustre filesystems, some advanced settings may be set via kernel module
parameters. QluMan pre-defines commonly used parameters together with their suggested default
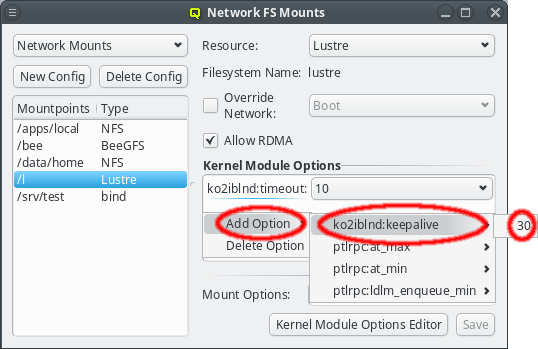
values. They may be added using the context-menu in the Kernel Module Options box. Additional options or values can be added using the Kernel Module Options
Editor. This works the same way as for generic properties. New options
must take the form module_name:option_name. Please refer to the Lustre documentation for a
list of available parameters and their meaning.
|
Per default, new |
Advanced BeeGFS mount options
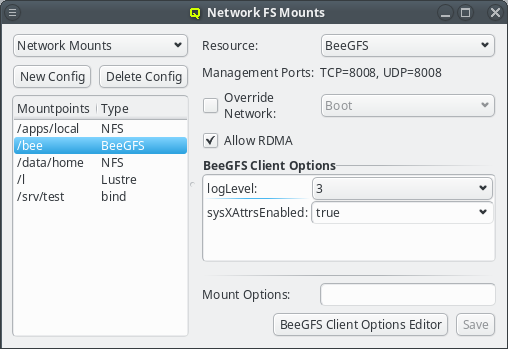
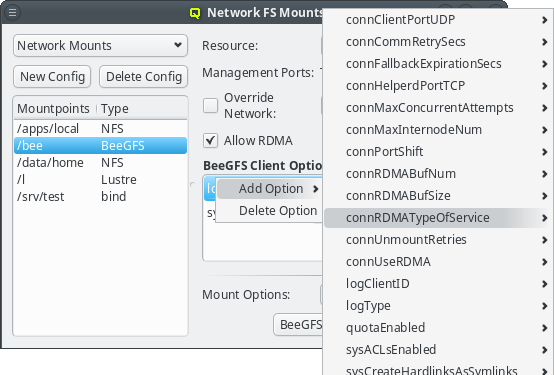
BeeGFS clients allow a lot of customization. For most options, the default values are
sufficient and don’t have to be explicitly set. Anything diverging from the defaults, can be
added via the BeeGFS Client Options box. The most likely options to add are
quotaEnabled (to enable the support of quota), sysACLsEnabled (to enable the support of
POSIX ACLs) and sysXAttrEnabled (to enable the support of extended attributes).
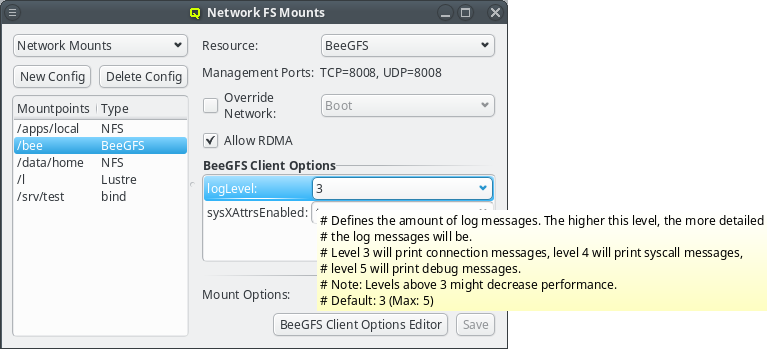
The pre-defined BeeGFS client options shown by QluMan are automatically generated from the
example configuration file distributed in the BeeGFS packages. Each option has a description
that can be seen as a tool-tip when hovering over an option that was already selected. The same
description is also shown in the BeeGFS Client Options Editor for the option that is selected
there. The editor can be opened by clicking the BeeGFS Client Options Editor
button and works the same way as for generic properties,
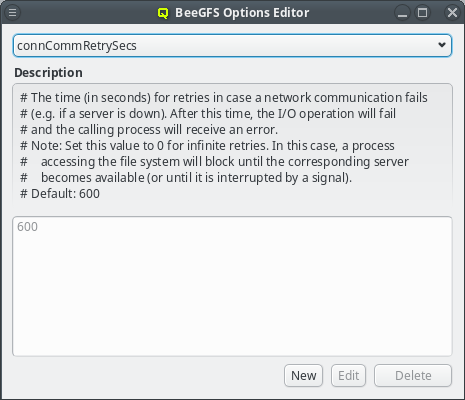
For options where a default value is provided in the example config file, this value will be
pre-defined and immutable in QluMan’s BeeGFS Client Options Editor. In case of boolean
options, both true and false will be pre-defined regardless of the default. For other
options, additional values must be added using the editor, before they can be assigned to a
BeeGFS mount config entry.
|
Options without a default, like e.g. |